User Tools

Site Tools


Materials in Hexagon

Introduction

Hexagon is a 3D modeler and does not have a built-in renderer. You can, however, prepare your models with textures in order to advance the texturing at the same time as you finalize the form of the model. Defining materials on an object is also needed to paint colors and textures.

Definition

A material is the visual characteristics of an object, regrouping:

  • A name.
  • A base color (diffuse color).
  • A highlight color (specular color).
  • A highlight spread value (shininess).
  • Transparency value.
  • A material type: flat color, checkers, imported image or new blank image with predefined size.
  • A Bump: image mapped in grey-level, a normal map or a new blank image with predefined size.

In these last two types, you can control the repetition of a pattern or image, and the way it merges with the base color of the object.

Remark:

Materials Palette

When you create an object, it has applied to it a default material of a flat light grey color. This material cannot be modified, and does not appear in the material list. To customize the object material, it is necessary to create a new material attached to this object.

You can edit materials in the materials palette, in the materials panel on the left of the screen (by default) or through the “Windows” pull-down menu, then choosing “Materials”.
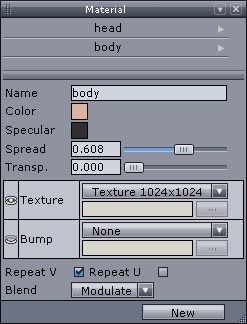
material_panel.jpg
The material panel.

Note: If no material has been created, the window is empty.

Materials Management

There must be a selected object in the scene in order to create a new material.

Creating a New Material

  • Select the object to which you want to apply a new material.
  • Click on the New button, creating a new material.
  • Hexagon shows the parameters of the material (diffuse and highlight color, transparency, highlight spread, material type).
  • If you choose a material type checker or image texture map you can use the parameter U and V repetition, which will let you activate or not the repetition of this texture map on your model.
  • If you want to create a new blank image-type texture, you can choose from different predefined sizes: from 128×128 up to 4096×4096. This image will be saved in the same folder than the Hexagon document, in PNG file format.
  • If you choose an image texture map, Hexagon will present a standard file import window to locate your file, and you can choose whether to mix your imported image with the base color (modulate), or override the base color with your image (decal).

Operations on Materials

Once the material has been created, several operations can be performed, accessible through a pull-down menu, by clicking on the small arrow located to the right of the material name:

  • Apply Material: applies the material to the selected object, or to the multi-selected objects.
  • Select associated objects: selects all the objects which own this material.
  • Rename Material: lets you change the name of the material.
  • Duplicate Material: allows you to create a copy of the material, with the same parameters as the current material.
  • Remove Material: definitively removes the material from the materials list, as well as on all objects on which this material was applied.

Shading Domains

Hexagon lets you place several materials on different parts of the same object. To do this, you will create shading domains. These are zones (polygon faces) on which you can place a material different than the base material of the object.
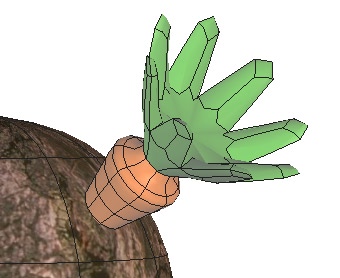
shading_domain_example.jpg
An object with two domains.

Creating a Shading Domain on a Selection of Faces

  • On your current object, make a selection of the faces you want to apply a specific texture to.
  • In the shading domain palette, choose an existing domain in the scrolling menu to save your polygon selection to, or click on the button New to create a new domain.
  • If you create a new domain, a new material is created as well, and is applied to that domain.
  • This material is automatically open for editing in the materials palette, where it can be fine-tuned.
  • You can also apply an existing material to the new domain: Open the pull-down menu by clicking on the small arrow located to the right of the domain name, and then select an existing material in the list.
  • The created or chosen shading domain is now the selected domain, notably for use of gizmos to place the UV coordinates.

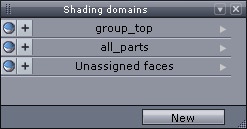
shading_domains_palette.jpg
The shading domains palette.

Remark:

  • Domains are linked to an object, not to the scene: two different objects cannot share the same domain.


Operations on Domains

Once a domain has been created, several operations can be performed. They can be accessed through a pull-down menu, by clicking on the small arrow located to the right of the domain name:

  • Select: selects faces corresponding to this domain on the object.
  • Set: adds the face selection to the domain.
  • Show domain faces: displays the faces belonging to the domain which have been previously hidden through the function “Hide domain faces”.
  • Hide domain faces: masks all the faces corresponding to the domain on the object. They can be unmasked by the above “Show domain faces” function. Note: this visibility status is not saved with the document. When the document will be re-opened, hidden faces will be visible again.
  • Rename: opens a dialog box through which it is possible to change the domain name.
  • Remove Domain: removes the domain from the domain list, as well as on the object on which it has been affected.
  • Change Material: lets you affect an existing material from the material list, replacing the current material associated with the active domain.