Table of Contents
DAZ Studio 4.x
- QuickStart Guide PDF
- User Guide PDF
* = Review
Parameters are aspects of Figures that allow the user to control the Figure in a variety of ways. All parameters show on the Parameters Tab, but to make DAZ Studio 4 more user-friendly, two additional tabs are provided which display subsets of the parameters: Posing and Shaping. These tabs also provide visual previews of the effect the control will have, if configured to do so. The Posing tab is typically used to display any parameter that moves parts of body via bones and weight maps. The Shaping tab contains controls for customizing shape of figure, typically by applying a morph target. By convention, Expression morphs are displayed on the Posing tab, even though they use morph targets, simply because customers associate expressions more with poses used to show a character in a particular position than with morphs which define a specific character.
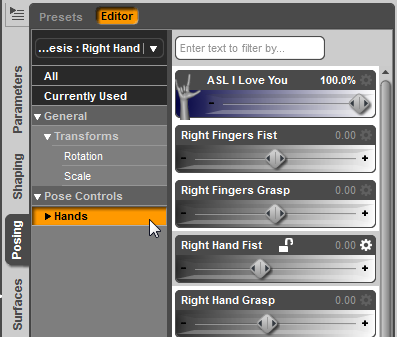
Within the Posing Tab, movement and expression controls are organized under Pose Controls.
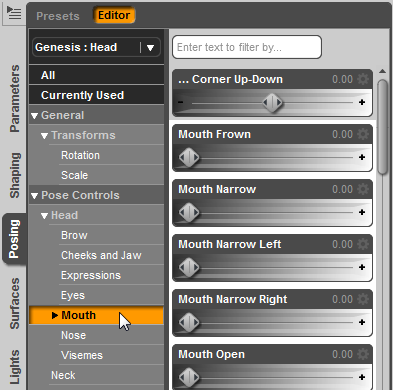
This property hierarchy is defined within the Property Editor, and is subdivided down to individual bones and facial features. For more information, see Creating a Pose Control *.
Where you categorize the control, whether morph or pose control, will not change how the control works, only where the user finds it.
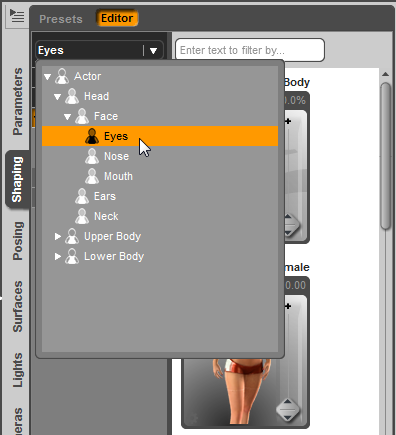
Within the Shaping (WIP) Pane, morph parameters are organized by Regions. Regions are selected by the user using the drop-down menu in the upper left of the Shaping Pane, or by using the region_navigator.
A Region is a special type of parameter group, and can be seen and edited using the polygon_group_editor. Regions can not be altered for existing published figures without issuing an update, but can be customized for original figures. The Transfer Utility will carry over regions from Genesis figure to conforming items, if used, but you can create additional regions or reorganize regions in conforming or original figures.
Regions are not tied to bones and rigging. They are a convenience for how to present parameters to the user in a hierarchy.
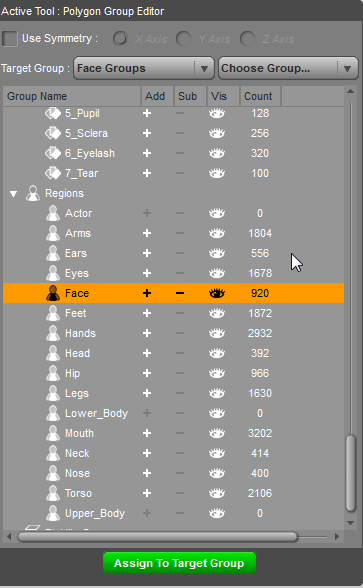
You cannot create your own Regions for existing figures, so find the place that is most logical. Universal is catch-all for neither male nor female specifically. Each place in the hierarchy will display everything at that level and below if you have checked “show sub-items.”
In the Parameters (WIP) Pane, find your new morph, click on the small gear, and choose Presentation Editor.
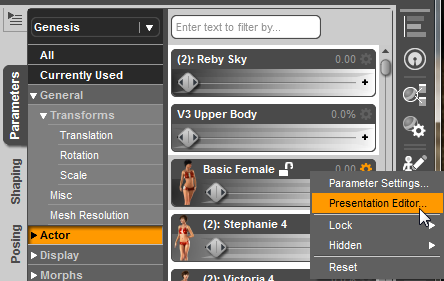
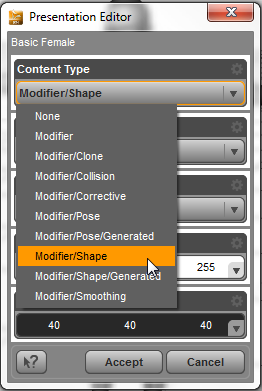
This allows us to specify how parameter is presented to user, including Content Type, icon images, and the gradient used on the controls. These values are saved in the dsf file.

Set the Content Type to either Modifier/Pose or Modifier/Shape, for the Posing (WIP) and Shaping (WIP) tabs, respectively. (Can't be both.) This is the first of two steps. (Modifier/Clone will work with AutoFit if you make a Genesis morph that matches a legacy figure.)
By convention, Expression morphs are displayed on the Posing tab. These include morphs to adjust the positions of the eyes and lids, and morphs such as “Nose Wrinkle.” These are controls meant to be usable with any character.
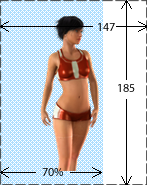
A Card Image should be a 147×185 pixel transparent .png. The illustration should be positioned on the left 70% of the image, and should contain only enough detail to indicate what the control does. Do not include a background. Observe the usual “family friendly” rules for images.
Downloadable template:

By design, the figure in the image is allowed to overhang the top and left boundaries. The bottom should be clipped just inside of the border for the bottom boundary, and the right should stop or fade into the background as it get to the vertical slider boundry. The intent is that the figure appears as though it is protruding out of the card.
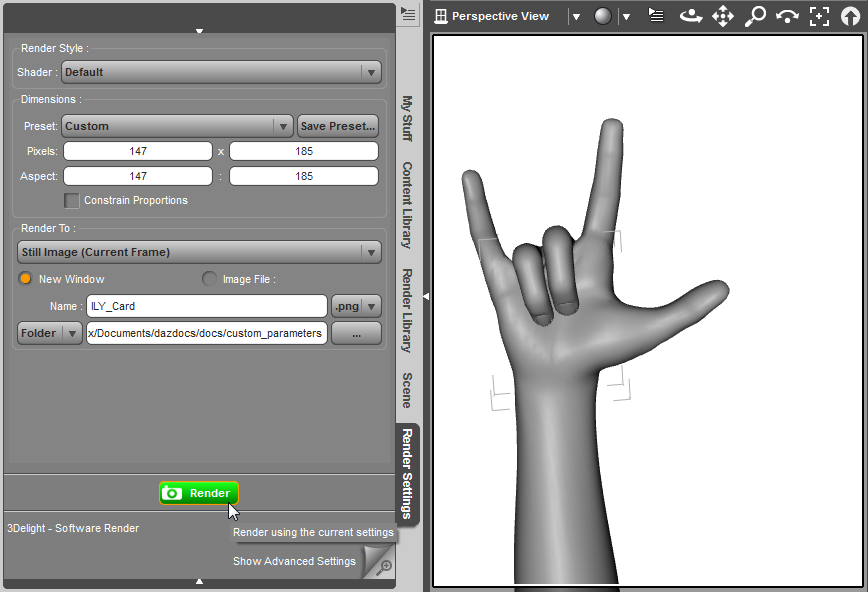
The image should be located with the .dsf file in the data folder, e.g. …data\DAZ 3D\Genesis\Base\Morphs\DAZ 3D\Base. Since the image path is defined in the Presentation Editor, the naming convention of this file is not critical, but it is recommended that the name match the name of the parameter it will be displayed on.
A separate Small Image may also be included, but is not necessary. If a Card Image is included, it will be resized and used automatically if there is no Small Image.
The standard gradients for DAZ 3D controls are 255.255.255 and 41.41.41. You may use other settings to visually distinguish your products, though consistency is highly recommended.
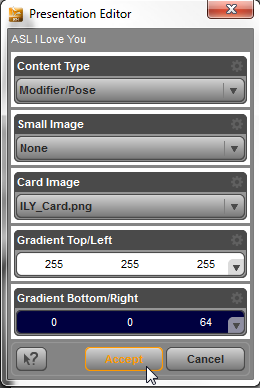
When you have finished making changes, click Accept.
View your control in the Shaping or Posing tabs:
If everything is displaying properly, save your work as a DSF Morph. (See Creating a Pose Control * for more information.)
Combinations of pre-existing morphs or other controls can be saved and the controls redistributed as shapes or poses. Expressions should be categorized as Poses. Other combinations could be saved as a character preset in content library, or left to display only in the Parameters tab.
